Curtains that stop 3 inches above the floor, or panels that barely meet in the middle, are almost always a measuring problem, not a shopping problem. Knowing how to measure for curtains comes down to taking a few numbers in the right order: where the rod will sit, how wide the fabric needs to be, and where the hem should land.
The window itself is only the starting point. Rod height, the type of curtain top, and even a radiator under the sill can change the size you need. The steps below work for ready-made panels and made-to-measure curtains, with worked numbers so you can check your own.
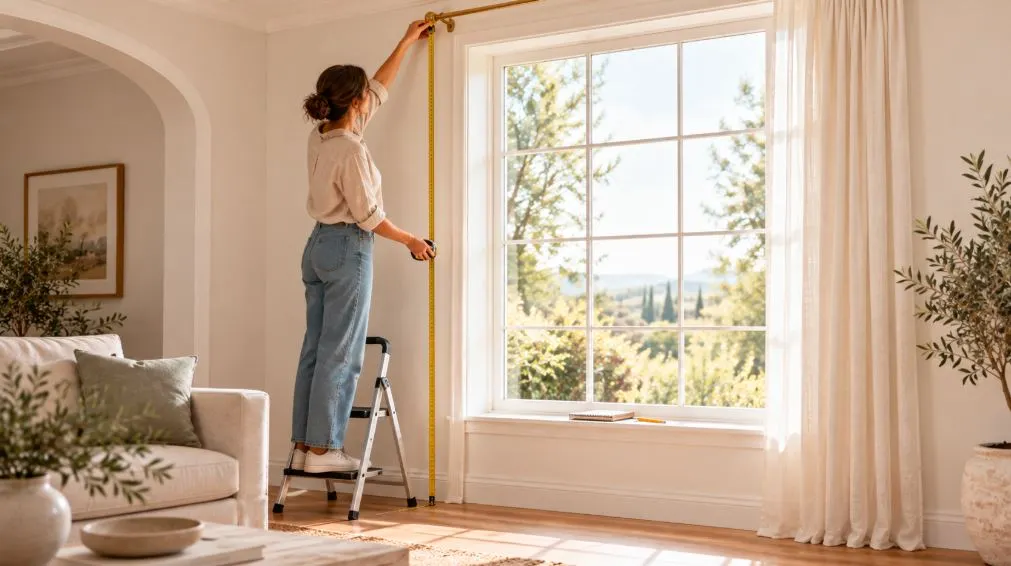
Measure the Rod Position, Not Just the Window
The most useful rule in curtain sizing is simple: width and length are measured from the rod, not from the glass. A curtain hangs from the rod, so if the rod sits 8 in (20 cm) above the frame and 10 in (25 cm) past each side, those extra inches decide the size you order.
That is why the best order, when you work out how to measure for curtains, is to decide the rod position first, mark it (or install the rod), and only then take width and length measurements. If you already have a rod or track in place, measure from that.
You only need a few things:
- A steel tape measure. Cloth tapes stretch and sag over long drops.
- A step ladder that lets you reach the top of the frame safely.
- A pencil and notepad, or painter’s tape to mark rod height on the wall.
- A helper for windows wider than about 6 ft (1.8 m), so the tape stays level.
Write every number down as you go, and note whether it is in inches or centimeters. Mixing the two is one of the easiest ways to order the wrong size.
Step 1: Decide How High and How Wide the Rod Should Be
Rod placement shapes the whole look. A rod hung high and wide makes a window look taller and larger, and lets the curtains open fully off the glass. A rod tight to the frame looks smaller and blocks more daylight when the curtains are open.
How high to hang the curtain rod
Most designers place the rod at least 4 to 6 in (10 to 15 cm) above the top of the window frame, and often higher. A common approach is to set it roughly halfway to two-thirds of the way between the top of the frame and the ceiling.
| Room situation | Typical rod position |
|---|---|
| Standard ceiling, small gap above window | Just below the ceiling, or about halfway between frame and ceiling |
| Standard ceiling, large gap above window | 8–10 in (20–25 cm) above the frame |
| High or vaulted ceiling | 12–24 in (30–60 cm) above the frame, so curtains do not look lost |
| Crown molding | Just below the molding |
| Grommet curtains near the ceiling | Leave at least 1 in (2.5 cm) between rod and ceiling, because fabric rises above the rod |
Keep the height the same on every window in one room, even if the frames are slightly different. A line of rods at one level looks intentional; rods at three heights look like a mistake.
How far the rod should extend past the window
For an outside-mounted rod, extend it about 4 to 12 in (10 to 30 cm) beyond each side of the frame. Around 8 to 10 in (20 to 25 cm) suits most average windows. The extra width gives the curtains somewhere to “stack” when open, so they cover wall instead of glass.
Thick, lined or blackout curtains take up more space when pushed back, so lean toward the wider end for those. Sheer panels stack more neatly and need less.
Inside mount or outside mount?
An outside mount puts the rod on the wall above the frame and is the right choice for most rooms. An inside mount fits a rod, often a tension rod, inside the window recess. It works for café curtains, deep window reveals and rentals where drilling is not allowed, but it makes the window look smaller and the curtains always cover part of the glass. For an inside mount, measure the recess width at the top, middle and bottom, and use the smallest number.

Step 2: Measure the Width and Work Out Fullness
Once the rod length is set, measure it from end to end. On a pole, measure between the finials (the decorative ends), not including them. On a track, measure the full track length. This is your rod width.
Width is where many people go wrong when they learn how to measure for curtains. Curtains need more fabric than the rod width, or they hang flat and look skimpy when closed. That extra is called fullness, and you work it out by multiplying the rod width.
| Fabric and look | Multiply rod width by | Why |
|---|---|---|
| Heavy, lined or blackout fabric | 1.5–2 | Thick fabric folds deeply on its own and stacks bulkier when open |
| Medium cotton, linen or velvet (most rooms) | 2 | Gives soft, even folds when closed |
| Sheer or very lightweight fabric | 2.5–3 | Light fabric looks thin and see-through without extra gathers |
Example: a 60 in (152 cm) rod at 2x fullness needs about 120 in (305 cm) of total curtain width. That could be two 60 in panels, or three panels of about 40 in.
How many curtain panels do you need?
Divide your total fabric width by the width of one panel, then round up. Many ready-made panels are around 50 to 54 in (127 to 137 cm) wide, but sizes vary by brand, so check the listing. If the answer is 2.3, buy three panels rather than squeezing two.
For a pair that meets in the middle, the two panels should overlap slightly when closed, about 2 to 4 in (5 to 10 cm). That small overlap blocks the gap of light that otherwise shows down the center at night.
If you want curtains that wrap around the ends of the rod to the wall, called returns, add the rod’s projection (the distance from wall to rod, often 3 to 4 in or 8 to 10 cm) to each side. Returns block side light and help a blackout curtain actually feel dark.
Step 3: Choose a Length Style Before You Measure the Drop
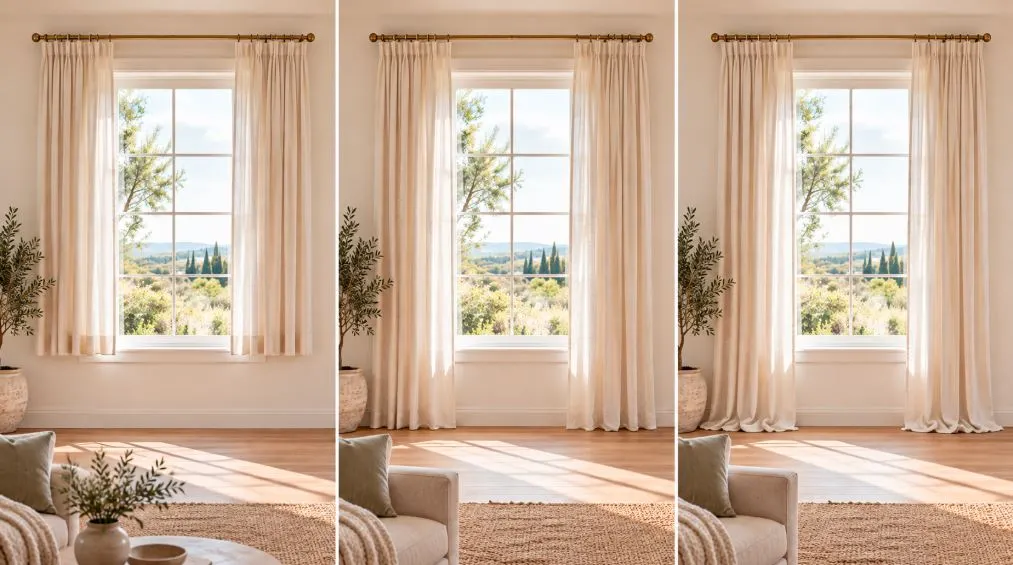
The “drop” is the curtain length from the rod down to the hem. Before measuring it, decide where you want the hem to finish, because the same window can take five different lengths.
| Length style | Where the hem lands | Best for |
|---|---|---|
| Sill length | About ½ in (1.3 cm) above the sill | Kitchens, bathrooms, windows with furniture below |
| Below-sill (apron) | About 4–6 in (10–15 cm) below the sill | Bedrooms with a radiator or bench under the window |
| Float | About ½ in (1.3 cm) above the floor | Living rooms, homes with pets or robot vacuums |
| Kiss or break | Touching the floor, or 1–2 in (2.5–5 cm) of extra fabric resting on it | A softer, tailored look in bedrooms and dining rooms |
| Puddle | 6–12 in (15–30 cm) of fabric pooling on the floor | Formal rooms with low foot traffic |
Floor-length curtains generally look more finished and make ceilings feel higher. Sill length is more practical where a counter, sink or radiator sits under the window. Puddled curtains look lovely in photos but collect dust and pet hair, and they get stepped on in busy rooms.
There is a practical reason to prefer longer curtains in cold rooms too. Cornell Cooperative Extension notes that draperies work best for energy saving when they touch the sill or floor and overlap at the center, while loosely hung curtains reduce window heat loss by no more than about 10 percent. Curtains help, but they cannot fix a leaky frame. If you feel cold air around the window itself, it is worth checking how to reseal windows before relying on heavier fabric.
Where to Start the Length Measurement for Each Curtain Top
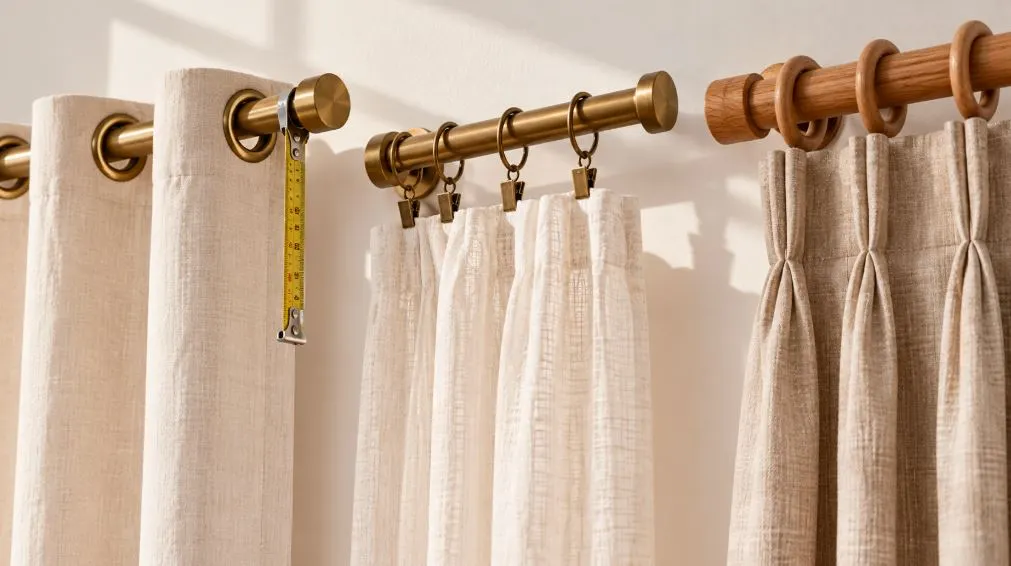
This is the step most guides skip, and it is the one that causes most “too short” returns. Where you start the tape depends on how the curtain attaches to the rod, because some tops sit above the rod and some hang below it.
Measure from the starting point in the table down to where you want the hem, using the length style you chose above.
| Curtain top | Start measuring from | What to watch for |
|---|---|---|
| Grommet (eyelet) | Top of the rod | Fabric sits above the rod, so the curtain usually hangs about 1 in (2.5 cm) shorter than its listed length |
| Rod pocket | Top of the rod | A ruffled heading above the pocket adds height; check the product’s header size |
| Back tab or tab top | Top of the rod | Tabs can lift the fabric slightly above the rod line |
| Clip rings | Bottom of the ring, where the clip attaches | Rings and clips can add 2–3 in (5–8 cm) of drop |
| Pinch pleat on rings or hooks | The small eye at the bottom of the ring | The pleat height is included in the panel length |
| Track (common in UK homes) | Top of the track | Most track heading tapes let the curtain cover the track |
Take the length measurement in at least three places along the rod: left, center and right. Floors are rarely completely level, especially in older homes. Use the shortest number for a float length, so no part of the hem drags.
Natural fabrics such as cotton and linen can shrink a little when washed. If you plan to machine-wash the curtains, check the care label first, and consider dry cleaning or buying a slightly longer panel that you can hem after the first wash.
How to Measure for Curtains: A Worked Example
Here is how the numbers come together on a typical window, so you can follow the same order with your own.
- Window: 48 in (122 cm) wide, frame top 80 in (203 cm) above the floor, ceiling at 96 in (244 cm).
- Rod height: roughly two-thirds of the way up the 16 in gap puts the rod at about 90 in (229 cm) from the floor.
- Rod width: 48 in window + 8 in each side = 64 in (163 cm) of rod.
- Fullness: medium-weight linen at 2x = 128 in (325 cm) of total fabric. Ready-made panels in this example are 54 in wide, so 128 ÷ 54 = 2.4, which means three panels.
- Length: grommet curtains, float length. Measured from the top of the rod to the floor at three points: 90, 89¾ and 90 in. Using the shortest (89¾ in) minus ½ in gives about 89¼ in (227 cm).
The closest ready-made sizes are 84 in and 96 in. Remember that grommet panels hang about 1 in shorter than their listed length. An 84 in panel would stop roughly 6 to 7 in above the floor, which looks short. A 96 in panel would pool by about 5 in. The simple fix is to adjust the rod: raising it to about 94 in (239 cm), while keeping at least 1 in below the ceiling for the grommets, lets a 96 in panel reach the floor with a slight 1 in break. Small rod adjustments like this often solve sizing problems without custom curtains.
Situations That Change the Measurements
Most advice on how to measure for curtains assumes a plain window on a plain wall. Real rooms usually have something in the way, and each of these changes the numbers.
A radiator, heater or vent under the window
Floor-length curtains over a radiator trap warm air behind the fabric and send it up against the cold glass. Choose sill or below-sill length, keep the hem clear of the heater, and follow the heater manufacturer’s guidance on clearance from fabrics. Never let curtains rest on a space heater or baseboard heater.
Furniture under the window
A desk, bed headboard or sofa under the window decides the length. Measure to about ½ in (1.3 cm) above the furniture top, or go full length and place the furniture slightly forward so the curtains can still close. If you are still planning the layout, the same habits used to measure a room for furniture help here: note the sill height and the space each side of the window before choosing pieces.
Wide windows and sliding doors
Rods longer than about 5 to 6 ft (1.5 to 1.8 m) usually need a center support bracket so they do not bow, and the bracket can stop grommets or rings from sliding past. Check that your rod set includes bypass brackets or rings designed for it, or use a track. For sliding doors, extend the rod far enough on the side the door opens so the stacked curtains do not block the handle or the opening.
Bay and corner windows
Measure each section of the bay separately along the rod or track line, not across the glass, then add the sections together. Bendable bay tracks and corner connectors are available for this, and they make measuring much easier because the curtain follows one continuous line.
Rentals and no-drill windows
If drilling is not allowed, a tension rod inside the recess, or adhesive or no-drill brackets that grip the window frame, can work. These have weight limits, so pair them with lighter fabric and check the listed load before hanging heavy blackout panels. Always check the lease before fixing anything to walls or frames.
Homes with young children
Choose curtains without long cords or loops, and keep any tieback or traverse cords short and out of reach. The U.S. Consumer Product Safety Commission recommends cordless window coverings in any room where a child may be present, and moving cribs and beds away from windows.
Choosing Ready-Made Sizes When Your Numbers Fall In Between
Once you know how to measure for curtains, the next challenge is matching your numbers to what stores sell. Ready-made curtains usually come in a handful of lengths, commonly 63, 84, 96, 108 and 120 in (about 160, 213, 244, 274 and 305 cm). Your measured length will rarely match one exactly. A few ways to close the gap:
- Move the rod up or down. A small shift in rod height is the easiest fix, as the worked example shows.
- Use clip rings to add 2–3 in (5–8 cm) of drop to a panel that is slightly short.
- Hem a longer panel. Buying one size up and hemming, or using iron-on hem tape, gives an exact finish. Measure the hem after hanging the curtain for a day, since some fabrics relax and drop slightly.
- Choose break length on purpose. An extra 1–2 in (2.5–5 cm) on the floor looks deliberate. Being 2 in too short never does.
In a bedroom, floor-length lined curtains also do a lot for how calm and enclosed the room feels at night, which is one of the simplest warm aesthetic cozy bedroom ideas to put into practice.
Measuring Mistakes That Lead to Returns
Most curtain returns come down to a handful of small errors:
- Measuring the glass instead of the rod, so the curtains are too narrow and too short
- Ordering panel width equal to the rod width, with no fullness
- Measuring length from the wrong point for the curtain top, such as the bottom of the rod for grommets
- Taking only one length measurement on an uneven floor
- Forgetting that rings, clips or headings change the drop
- Mixing inches and centimeters between the tape and the product listing
A quick check before ordering is to hold the tape at the planned rod height and pull it down to the planned hem. Seeing the line on the actual wall often catches mistakes that look fine on paper.
Frequently Asked Questions
How far past the window should a curtain rod extend?
A curtain rod usually extends about 4 to 12 in (10 to 30 cm) past each side of the window frame, with 8 to 10 in (20 to 25 cm) suiting most windows. The extra width lets the curtains stack against the wall when open instead of covering the glass, so more daylight gets in.
How high above the window should curtains hang?
Curtains usually hang at least 4 to 6 in (10 to 15 cm) above the window frame, and often higher. Placing the rod about halfway to two-thirds of the way to the ceiling makes the window look taller. In rooms with crown molding, set the rod just below it.
Should curtains touch the floor?
Curtains look most finished when they float about ½ in (1.3 cm) above the floor or just touch it. A slight break of 1 to 2 in suits bedrooms and dining rooms, while floating curtains are easier to clean around in busy rooms and homes with pets.
How many curtain panels do I need for one window?
Multiply the rod width by your fullness, usually 2, then divide by the width of one panel and round up. For example, a 64 in rod at 2x fullness needs 128 in of fabric, which is three 54 in panels. Most standard windows need two to three panels.
Do you measure curtain length from the top of the rod or the rings?
It depends on the curtain top. Grommet, rod pocket and tab top curtains are measured from the top of the rod. Curtains on clip rings or pinch pleats on rings are measured from the small eye at the bottom of the ring, because the ring adds length.
Before You Order: A Two-Minute Check
With your numbers written down, run through them once more. You should have a rod height, a rod width, a total fabric width with fullness, a panel count, and a length measured from the right starting point for your curtain top, using the shortest of three readings.
If any of those is missing, that is where the sizing usually goes wrong. Learning how to measure for curtains properly takes ten minutes the first time, and it saves the far bigger hassle of rehanging rods or sending curtains back. Keep the notes with the receipt, so replacing or adding panels later is just as easy.