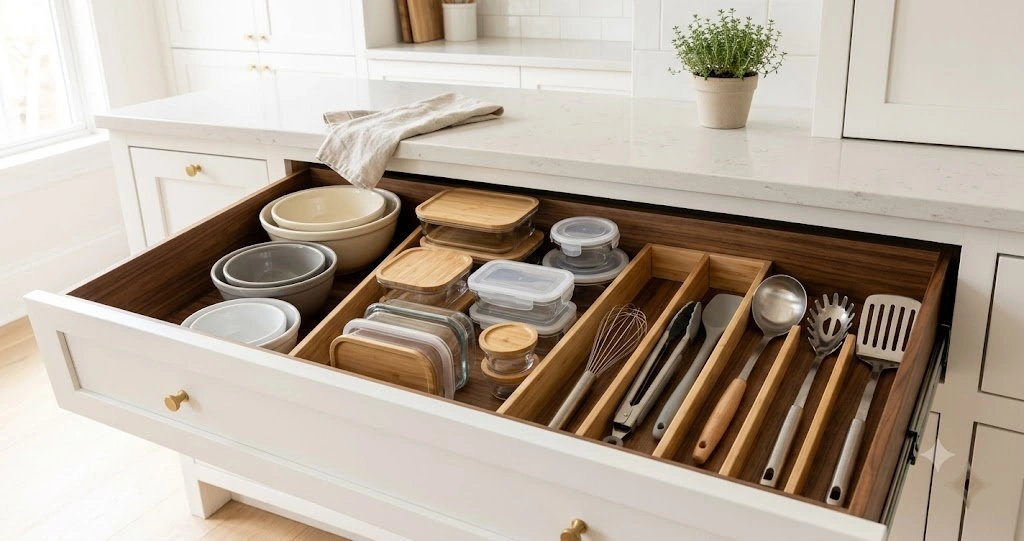
To organize deep kitchen drawers, start by looking at what you keep in them. These drawers can hold bulky cookware, dishes, food containers, and small appliances. But when unrelated items share one large space, smaller pieces disappear under larger ones, and you may have to unload the drawer to find what you need.
The best way to organize a deep kitchen drawer is to give it one clear purpose, measure the usable interior, place the largest items first and add only the dividers or bins needed to stop categories from mixing. Frequently used items should remain visible and easy to lift from above.
A well organized drawer does not need to be completely full. It works when you can find an item, remove it and return it without rearranging everything around it.
Decide What Each Deep Drawer Should Hold
Do not begin by shopping for organizers. First decide what belongs in the drawer.
Deep drawers usually work better for bulky or tall kitchen items than for loose collections of tiny utensils. Suitable contents include:
- Mixing bowls
- Plates and serving bowls
- Food storage containers
- Baking dishes and trays
- Pots and pans
- Colanders
- Small appliances
- Baking supplies
- Dish towels and oven mitts
Give each drawer one main purpose or a few closely related categories. A baking drawer might contain mixing bowls, measuring cups, baking dishes and a hand mixer. A cookware drawer might hold everyday pans and the lids used with them.
Avoid combining items simply because space is available. A drawer containing a frying pan, napkins, blender parts, reusable bags, pet treats and bottle openers has no clear logic. Separate bins may make it look tidy for a day, but the drawer will still be difficult to maintain.
Measure the Usable Interior
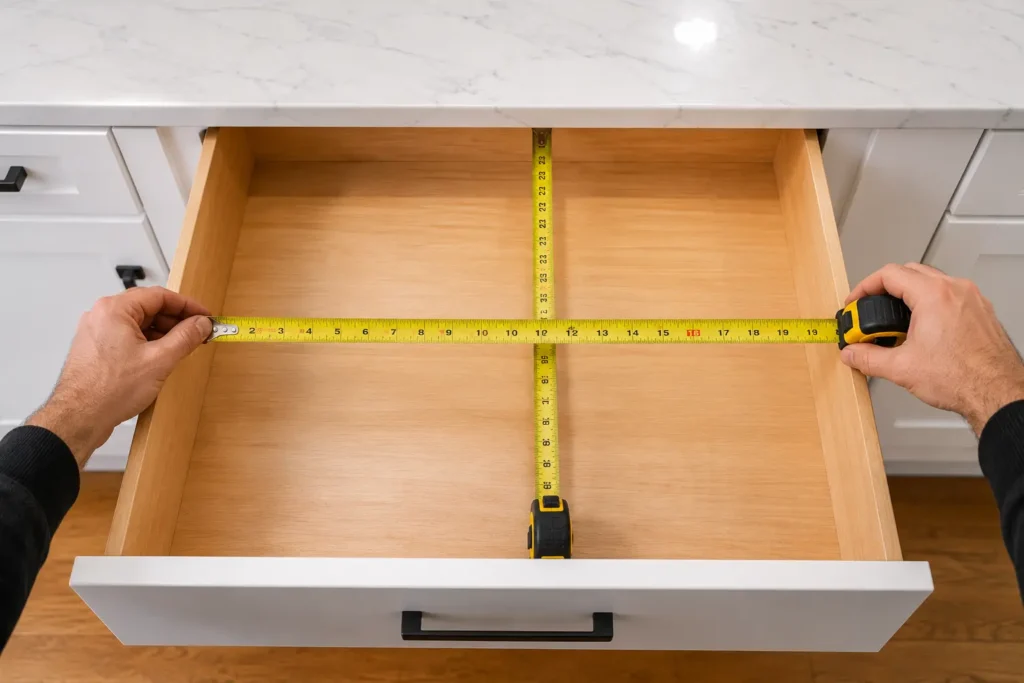
Kitchen drawers are often smaller inside than their cabinet labels suggest. Drawer sides, runners, back panels, handles and surrounding cabinet hardware can reduce usable space.
Empty the drawer and measure:
- Internal width from side to side
- Internal depth from front to back
- Usable height from the base to the lowest obstruction above
- Any narrow points created by hardware or curved drawer sides
Measure the narrowest usable points rather than the widest opening. Check whether tall containers, pan handles or upright lids will hit the cabinet frame when the drawer closes.
Write the measurements down before shopping. An organizer that is slightly too large will not fit, while one that leaves wide gaps may slide each time the drawer opens.
Modular organizers are often easier to fit than one fixed tray because individual pieces can be rearranged. In its tested kitchen drawer organizer guide, Food & Wine found that modular layouts, visibility, non slip feet, adjustable compartments and fit all affected how practical an organizer was in everyday use.
Empty, Edit and Group the Contents
Work with the full drawer at once rather than moving a few items around the existing clutter.
Empty and Clean the Drawer
Place everything on a counter or table. Vacuum crumbs, wipe the interior and let it dry before replacing anything.
Use this opportunity to check for loose liners, damaged dividers or a drawer that no longer opens smoothly.
Remove Items That Do Not Belong
Return objects to their proper kitchen zones or other rooms. Discard broken tools and consider donating usable duplicates that are rarely needed.
Keep duplicates only when they support the way you cook. Two spatulas may be useful during meal preparation. Six nearly identical bottle openers probably do not need valuable drawer space.
Group Items by Task
Group items according to how they are used rather than by color or material. Useful task groups include:
- Everyday cooking
- Baking
- Food preparation
- Serving
- Food storage
- Lunch packing
- Coffee and tea
- Cleaning textiles
Task based groups reduce unnecessary movement. Measuring cups, mixing tools and baking dishes are more useful together than when separated because some are metal and others are plastic.
Test a Layout Before Buying Organizers
Place the largest items in the empty drawer first. Try two or three arrangements before adding bins, pegs or dividers.
Open and close the drawer several times. Check whether:
- Items slide or tip
- Handles catch on the sides
- Tall pieces prevent closing
- Stacks are difficult to lift
- Frequently used items are trapped underneath others
- There is enough room for your fingers
Temporary cardboard boxes or existing containers can help you test boundaries for several days. This trial often shows that fewer organizers are needed than expected and prevents money being spent on a layout that does not match daily habits.
Divide the Drawer Into Access Zones
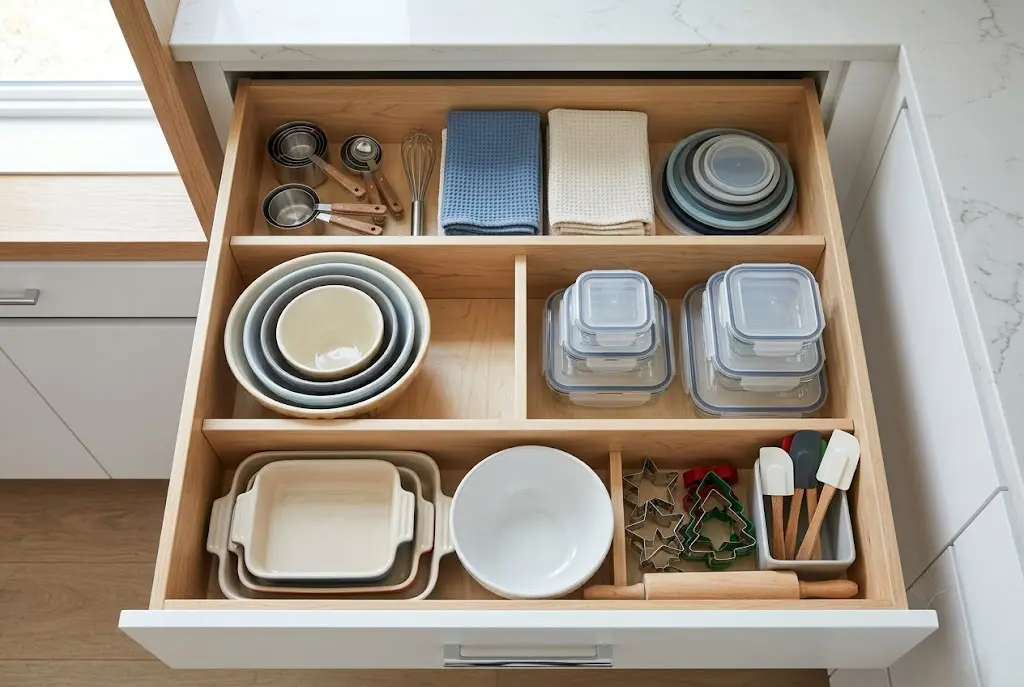
Treating a deep drawer as one large container encourages clutter. Divide it into front, middle and back zones according to frequency of use.
Keep Everyday Items Near the Front
Place items used several times a week at the front or in the position that is easiest to lift. This may include everyday bowls, common food containers, frequently used pans, dish towels or lunch supplies.
Do not pack this area too tightly. If an item is difficult to return, it will soon be left in the wrong place.
IKEA’s kitchen organization guidance also recommends keeping frequently used items as accessible as possible and using clear compartments to help each item retain its place.
Use the Middle for Complete Categories
The center of the drawer can hold a complete category such as a bowl set, food containers or baking dishes. Use dividers when pieces lean, spread or mix with neighboring groups.
Keep each category within a clear boundary, but leave enough room to remove items without scraping your fingers against a divider.
Reserve the Back for Occasional Items
The back is suitable for serving pieces, seasonal baking tools or accessories used less often.
Avoid leaving tiny loose objects in this zone. Place them in a handled or removable bin so the entire group can be lifted forward instead of searched one piece at a time.
Choose the Right Layout for What You Own
The contents should determine the storage method. Do not force your belongings into an attractive organizer that makes them harder to use.
Plates and Bowls
Deep drawers can make plates and bowls easy to see from above. Adjustable pegs or padded dividers can keep separate stacks in position.
Before moving dishes into a drawer:
- Leave finger space around each stack
- Avoid unstable stacks simply because the drawer is tall
- Place heavier dishes where the drawer still opens smoothly
- Protect fragile edges from hard dividers
- Check the cabinet manufacturer’s guidance before storing heavy stoneware
Shorter stacks are usually easier to lift from and less likely to shift.
Food Storage Containers
Store containers and lids as two connected groups rather than mixing them together.
Possible layouts include:
- Nested containers with lids stored vertically beside them
- Containers grouped by size in open bins
- Each container stored with its lid attached
- Glass containers separated from lightweight plastic pieces
Deep nesting saves space only when the containers separate easily. If several pieces must be removed to reach one size, create smaller stacks.
Attaching lids prevents mismatches but uses more room. Separate vertical lid storage is more compact, but it works only when everyone returns lids to the correct section.
Baking Dishes, Trays and Cutting Boards
Store flat baking dishes, trays, cutting boards and cooling racks vertically when the drawer is tall enough. A filing style layout allows one item to be removed without lifting a full stack.
Use stable dividers and keep sections narrow enough to prevent heavy dishes from leaning. Measure handles, lips and raised edges not just the flat body of each item.
Large Kitchen Utensils
Spatulas, tongs, ladles, whisks and serving spoons can lock together when dropped into one deep pile.
Use long compartments so tools lie in the same direction. Group them broadly by function, such as cooking, baking and serving instead of giving every tool a separate slot.
Move genuinely small utensils to shallow removable bins near the front or to a shallower drawer if one is available.
Pots, Pans and Lids
Keep only cookware that fits comfortably and can be removed without unloading a large stack.
Store the most frequently used pan near the top or in its own section. Use a stable vertical divider for lids when the drawer height allows and protect nonstick surfaces from rough metal edges.
Spread heavy cookware across the usable width rather than concentrating all the weight on one side. If the drawer begins to sag, scrape, tilt or resist closing, remove weight and inspect the slides.
Small Appliances
A deep drawer may hold a hand mixer, blender attachments, food processor parts or another compact appliance. It is less suitable for equipment that is awkward to lift or makes the drawer difficult to operate.
Keep each appliance with the parts needed to use it. Wrap cords loosely, keep plugs from scratching nearby items and allow appliances to cool fully before storage.
Use Vertical Space Without Hiding Things
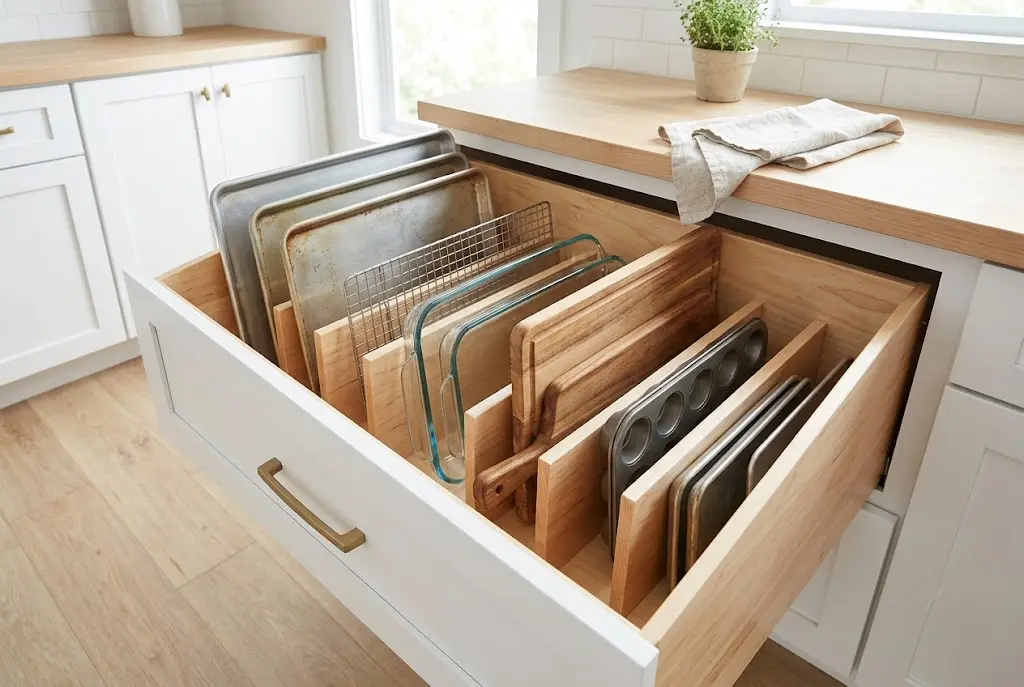
A deep drawer does not need to be filled to the top. Empty air above a bowl or appliance is not wasted when the item remains visible and easy to lift.
Use height only when it improves access. Helpful options include:
- Tall dividers for trays and boards
- Pegs around dish stacks
- Deep open bins for grouped supplies
- Vertical lid storage
- Upright folded towels
- One removable shallow tray for lightweight tools
Avoid stacking several closed containers. The lower level will become inconvenient and eventually forgotten.
IKEA’s guide to organized kitchen drawers suggests combining organizer pieces according to drawer width, leaving part of the drawer open for bulky items and using pegboard style organizers for deeper drawers. This supports a flexible layout rather than filling every inch with one fixed insert.
Stop Organizers and Contents From Sliding
A drawer will not stay organized if every bin moves when it opens.
Start with a close fitting layout. Then use one or more of the following where needed:
- Non slip drawer liner
- Organizers with rubber or non slip feet
- Removable grip pads beneath bins
- Pressure fit adjustable dividers
- A fitted pegboard system
- Surface safe removable adhesive grips
Test adhesives in an unseen area first because some products may leave residue or affect delicate finishes.
A liner can reduce noise from metal or ceramic items, but it may be unnecessary when the organizers already have stable non slip bases.
Avoid Common Deep Drawer Mistakes
Buying Organizers Before Measuring
A popular organizer is useless if it blocks the drawer, leaves large gaps or cannot hold your actual items. Plan the layout first and buy only the pieces needed.
Mixing Too Many Categories
A deep drawer should not become the default home for anything without a place. Limit it to one main task or a few closely related groups.
Using Bins That Are Too Tall
Tall bins may use the drawer’s full depth, but they can hide small objects. Choose a height that keeps labels, handles or item tops visible from above.
Creating Stacks That Must Be Unloaded
If a frequently used item is always under something else, shorten the stack, change the order or store the pieces vertically.
Filling Every Empty Space
A drawer packed to full capacity leaves no room for gripping items or adjusting the layout later. A small amount of open space makes the system easier to use.
Organizing for Appearance Instead of Routine
Matching containers may look neat while adding unnecessary steps. The best system should match how the household cooks, unloads the dishwasher and puts groceries away.
Organize Deep Kitchen Drawers on a Budget
A useful drawer system does not require a custom insert.
Begin with clean items already available at home:
- Sturdy boxes with low sides
- Small washable bins
- Spare open containers
- Non slip liner left from another project
- Reused trays for baking tools
- Removable pressure fit dividers
- Magazine holders for lightweight boards or lids, if they fit securely
Use temporary containers for a week before purchasing permanent organizers. Notice which categories still mix, which items slide and which boundaries are unnecessary.
Renters should favor removable bins, liners, peg systems and pressure fit dividers that do not require drilling. Check that pressure fit ends will not mark the drawer finish.
Keep the Drawer Organized
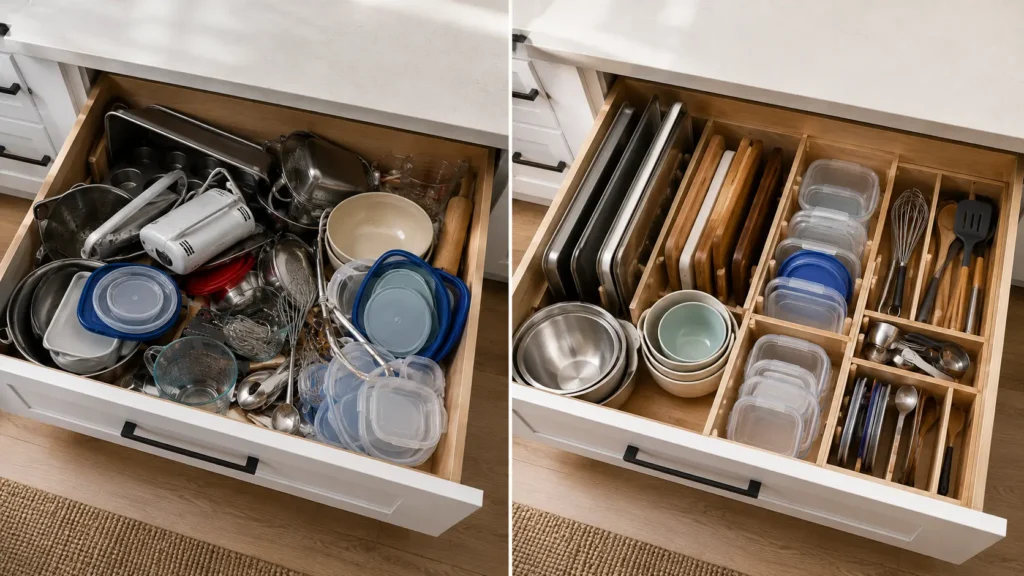
The system should be simple enough to maintain during normal cooking and cleanup.
Follow a few basic rules:
- Return items to their assigned zone
- Do not add a new category without relocating another
- Store only clean, dry items
- Review duplicates every few months
- Wipe crumbs before they build up
- Adjust the layout when cooking habits change
- Remove organizers that no longer solve a problem
Labels can help when several people use the kitchen, but they are not necessary when each category is obvious.
The true test is not how the drawer looks immediately after organizing. It is whether the arrangement still makes sense after several weeks of cooking, dishwashing and hurried cleanup.
Conclusion
Choose the deep drawer that wastes the most time. Empty it, give it one clear purpose and arrange the largest items before adding organizers.
Use a temporary layout for several days. Buy permanent dividers or bins only after you know which items move, which areas become crowded and what remains difficult to reach.
A deep drawer does not need the greatest possible number of containers. It needs visible categories, stable boundaries and enough open space for every item to be returned easily.
FAQs
Should Every Deep Kitchen Drawer Have Dividers?
No. Dividers are useful when items shift, lean, mix together or lose their assigned places. A single appliance or stable bowl stack may need only a non slip base and enough clearance.
Can Organizers Be Stacked Inside a Deep Drawer?
One removable or sliding upper tray can work for lightweight tools. Avoid stacking closed bins that hide lower items or add several steps to reach something used regularly.
What Should I Do if Small Utensils Disappear in a Deep Drawer?
Place them in shallow removable containers near the top or front. A better option may be moving them to a shallower drawer and reserving the deep drawer for bulkier items.
Is Vertical or Horizontal Storage Better?
Store trays, boards, lids and some bakeware vertically when secure dividers keep them upright. Bowls, plates, containers and most appliances are generally easier to store flat.
How Do I Know Whether the System Is Working?
The system works when most items are visible from above, can be removed without unloading a stack and can be returned without rearranging the rest of the drawer.